BatchForce Tutorial Part 0 | Installation Guide (EN)
BatchForce Tutorial Part 1 | Basic Workflow (EN)
BatchForce Tutorial Part 2 | Advanced Settings (EN)
BatchForce Tutorial Part 3 | Upload to Adobe Stock (EN)
What you will learn
This guide walks you through the full BatchForce Metadata workflow: importing your images and videos, configuring how the AI should generate metadata, reviewing and editing the results, and finding your CSV files ready to upload to stock platforms.
Note: Before you start: make sure you have installed the app, activated a license or started a free trial, and saved your OpenAI API key. If you have not done these yet, see the "How to Install" guide first.
1. Add files to your workspace
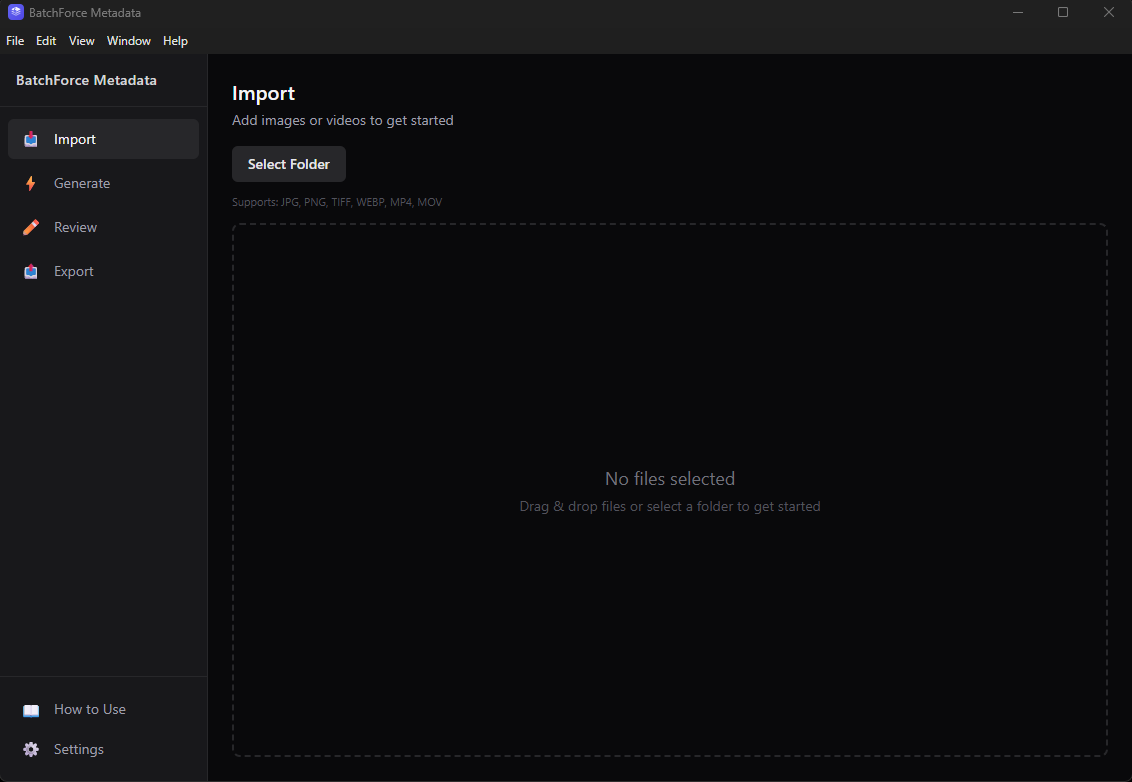
Open the Import tab in the sidebar. This is where you load the images and videos you want to generate metadata for.
You have three ways to add files: click the Select Folder button to pick a whole folder at once, drag and drop a folder onto the dashed drop zone, or drag individual files in. All three add files to the same list — they do not replace what is already there.
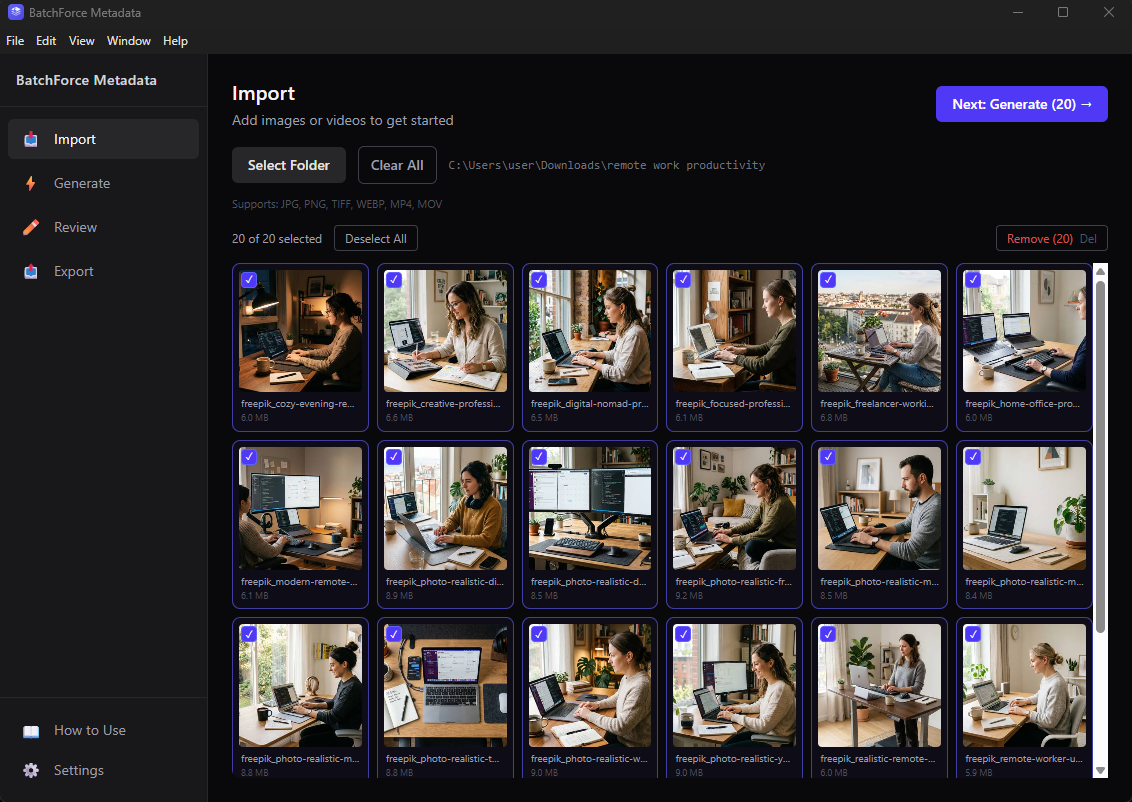
After loading files you see thumbnails for every image and a video keyframe for every clip
2
Select which files to process
Click any thumbnail to toggle its checkmark. Use the Select All / Deselect All buttons to flip the whole list, drag a rubber-band selection to grab a region, or press Delete to remove only the selected files. Clear All wipes the list.
Warning: Subfolders are NOT scanned recursively. Only files at the root of the folder you selected are imported. If your photos live in nested folders, drag each subfolder in separately.
Tip: Supported formats: JPG, JPEG, PNG, TIF, TIFF, WEBP for images and MP4, MOV, M4V for videos. HEIC, AVIF, WebM, AVI, MKV and GIF are not supported.
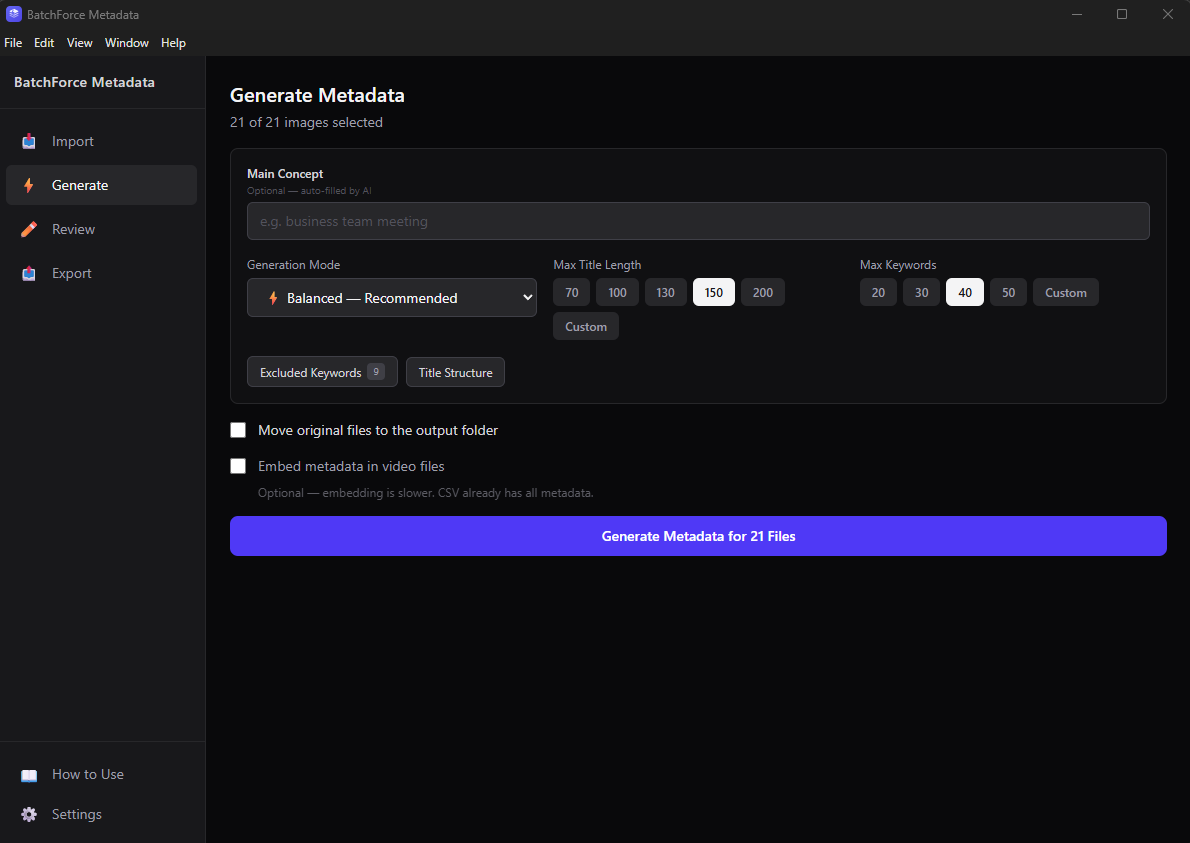
2. Configure generation settings
When you have your files loaded, click "Next: Generate" to move to the Generate tab. This is where you tell the AI what kind of metadata you want.
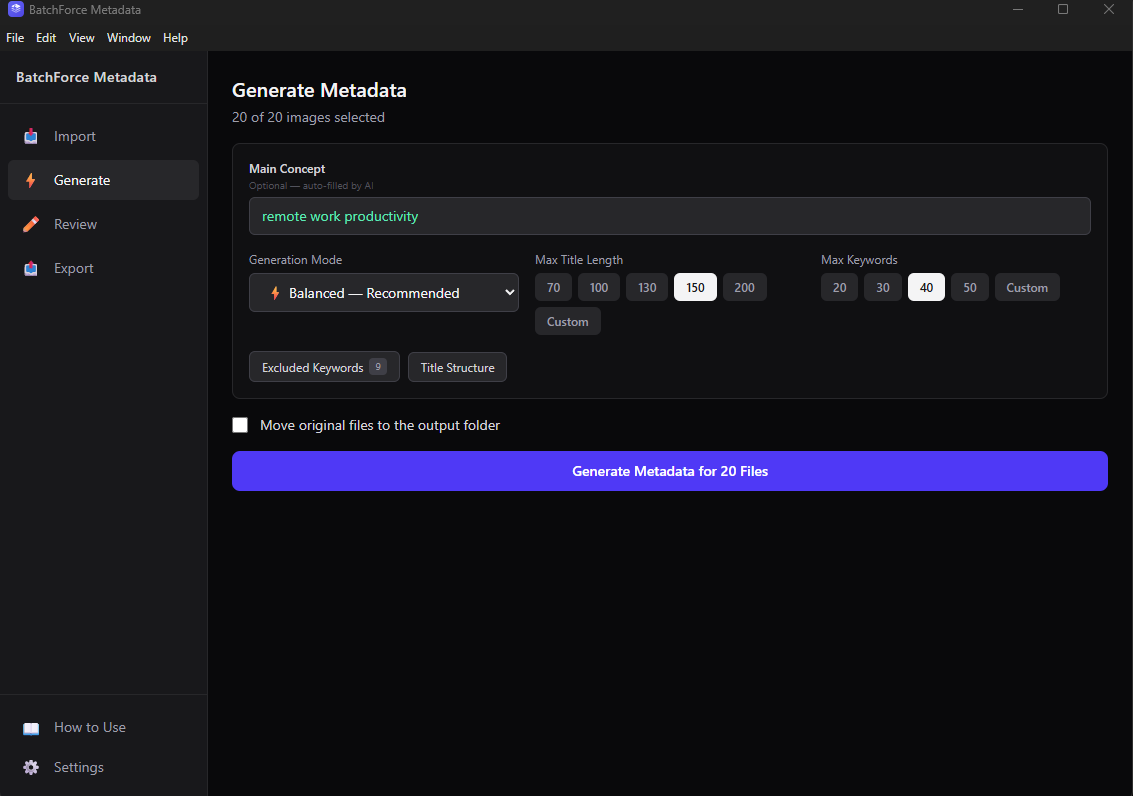
The Generate tab — adjust the settings, then click Generate Metadata
Main Concept (optional)
A short phrase describing the theme of this batch — for example "remote work productivity" or "summer beach vacation". The AI uses it as a steering hint and guarantees a sub-phrase of it appears in the top 3 keywords. Leave it blank if you want the AI to detect the theme from each image on its own.
Generation Mode (required)
Pick one of three quality / cost levels:
• Balanced (recommended) — best mix of quality and cost. This is the default.
• High Quality — slowest and most expensive, best for hero images and editorial work.
• Budget — fastest and cheapest, good for high-volume batches where speed matters more than nuance.
Max Title Length and Max Keywords
These set hard caps on the AI output. Title length defaults to 150 characters (presets: 70 / 100 / 130 / 150 / 200, or any number from 10 to 300). Keywords default to 40 (presets: 20 / 30 / 40 / 50, or any number from 5 to 50). Pick whatever matches the platform you upload to most often — Adobe Stock and Shutterstock both accept up to 50.
Excluded Keywords (optional)
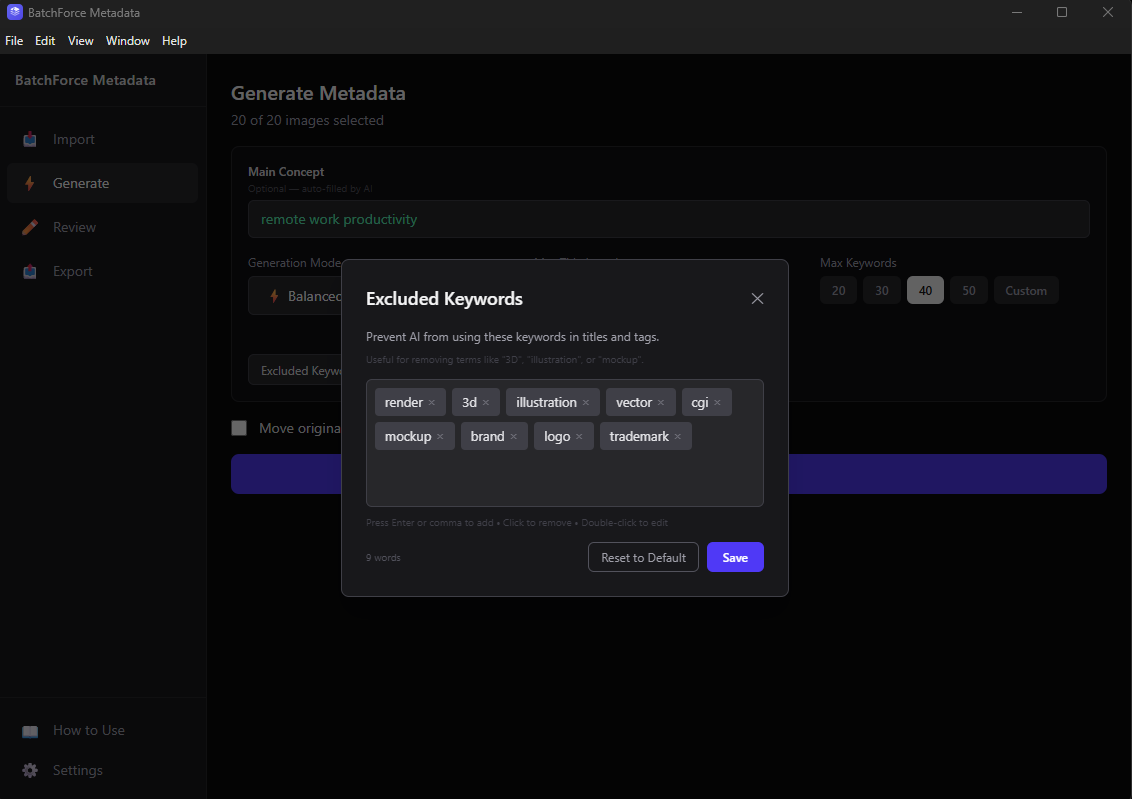
Click the Excluded Keywords button to open a tag editor. Any word in this list will never appear in the keywords output. The default list blocks 9 common words like render, 3d, illustration, vector, cgi, mockup, brand, logo and trademark. Press Enter or comma to add a tag, click × to remove, double-click to edit. This only filters keywords — your title and description are not affected.
The Excluded Keywords dialog — add or remove tags before generating
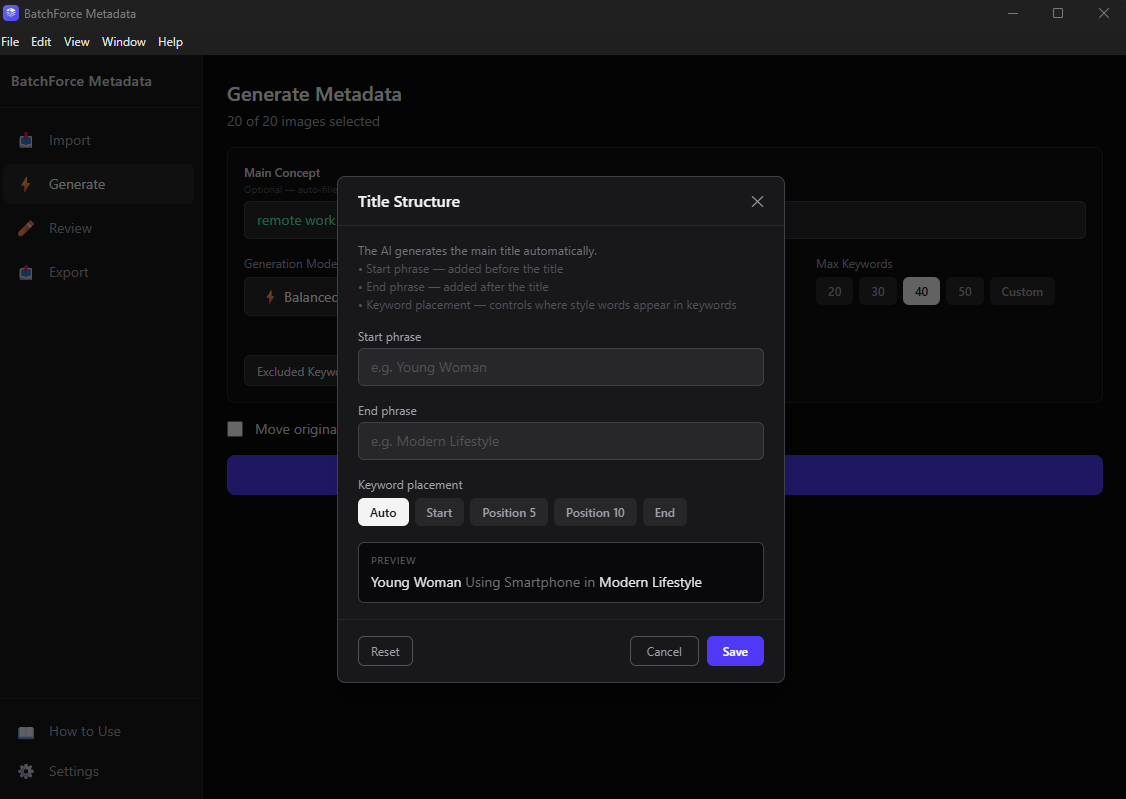
Title Structure (optional)
If you need every title to start or end with a specific phrase (for example a campaign tag), click Title Structure. You can set a Start phrase, an End phrase, and where the AI should drop the keyword: Auto, Start, Position 5, Position 10 or End. The dialog shows a live preview as you type.
Title Structure dialog with a live preview of how the title will look
Move original files (off by default)
When this toggle is OFF (recommended), your original files are copied into the output folder. When ON, originals are moved — they no longer exist at their starting location. Leave it OFF unless you specifically want to relocate the source files.
Tip: Speed estimates: Balanced takes about 5-10 seconds per file, High Quality 10-20 seconds, Budget 3-5 seconds. The app processes multiple files in parallel, not one at a time, so a batch of 50 finishes much faster than 50 × the per-file time.
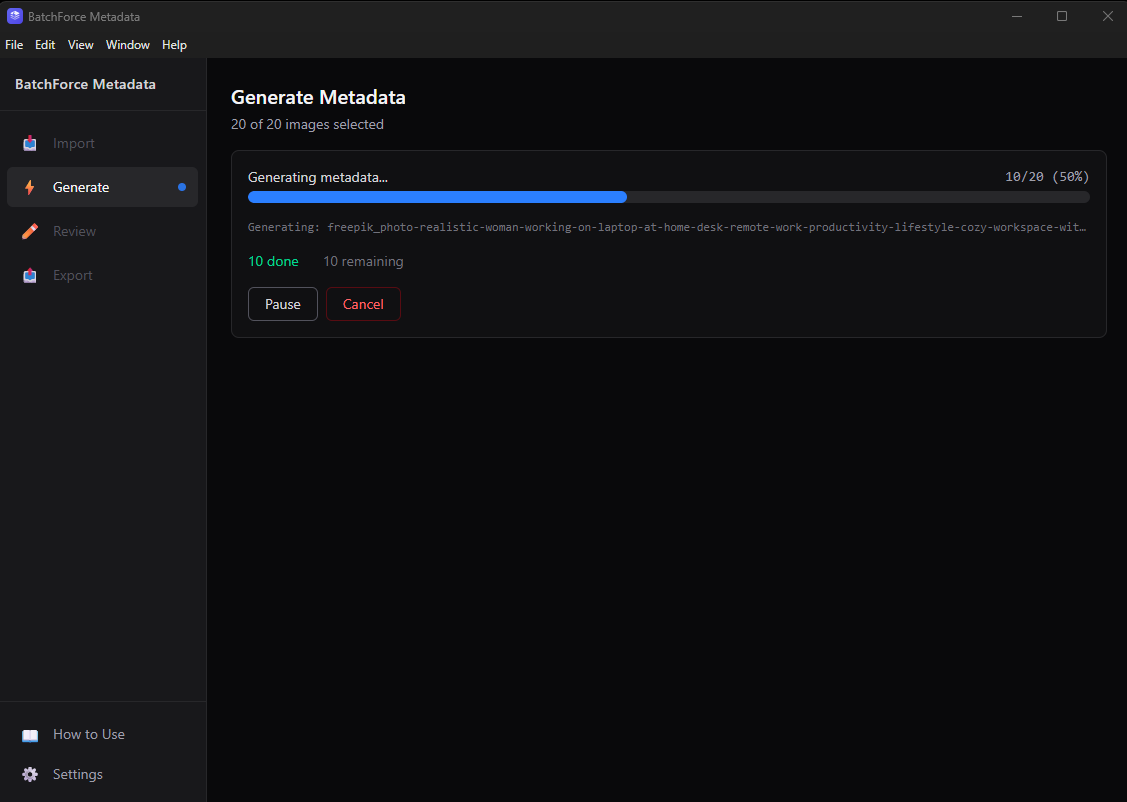
3. Generate metadata
Click the purple Generate Metadata button. The app runs the full pipeline — AI generation, image copy, 300 DPI setting, metadata embedding, and CSV export — in one pass. Regular PNG photos are automatically converted to JPG (quality 100%) for stock agency compatibility. Transparent PNGs (cutouts, isolated objects) are kept as PNG. You do not need to do anything extra after this.
The progress bar shows the whole pipeline, not just the AI step
Note: You can hit Pause to stop temporarily and Resume later, or Cancel to abort the whole batch. Files that already finished stay processed — only the files still in flight are stopped. Failed files are saved to an ERROR/ folder so you do not lose them.
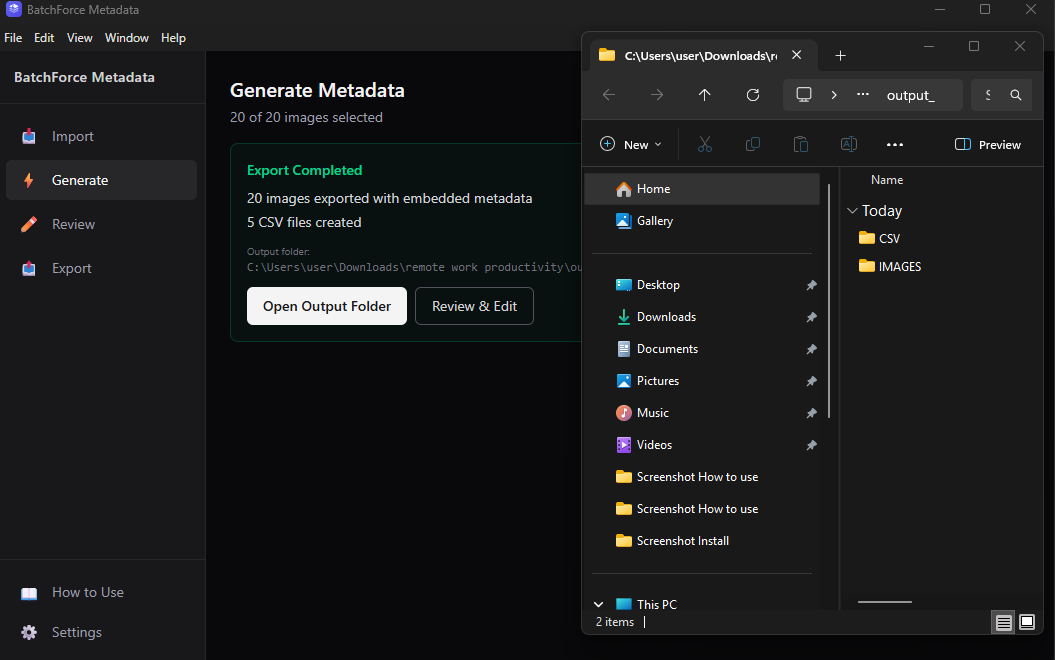
4. Generation complete
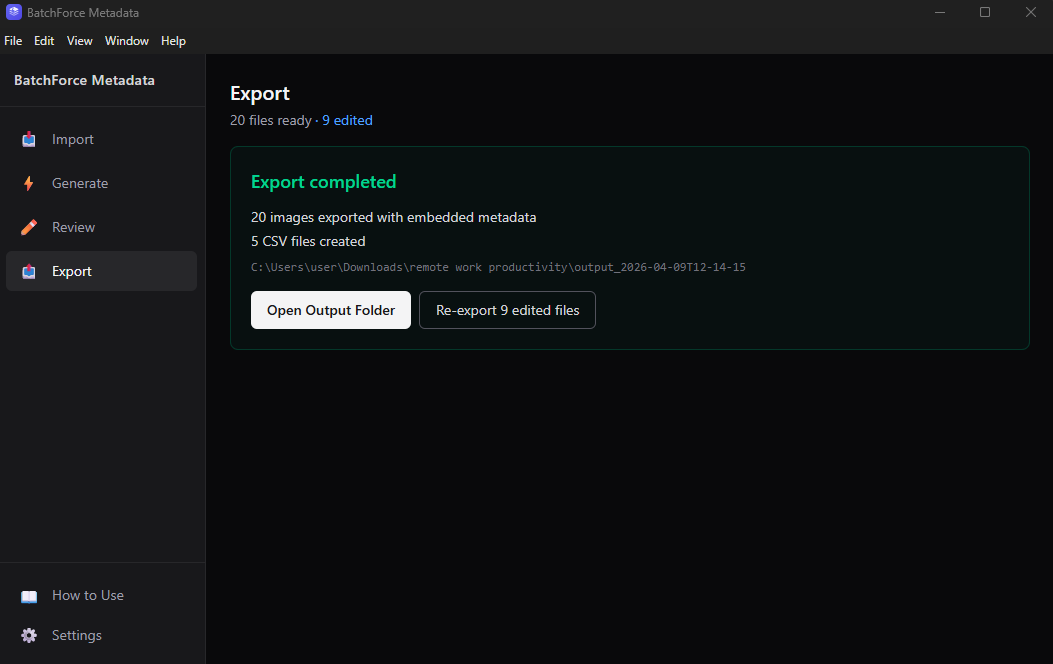
When the batch finishes, you see a green success block with the number of files exported, the number of CSV files created, and the path to the output folder.
Success — your output folder is ready
Note: Export is fully automatic. The success block has Open Output Folder (jump straight to the result) and Review & Edit (tweak the metadata before uploading). You only need to use the separate Export tab if you go to Review and want to re-export your edits.
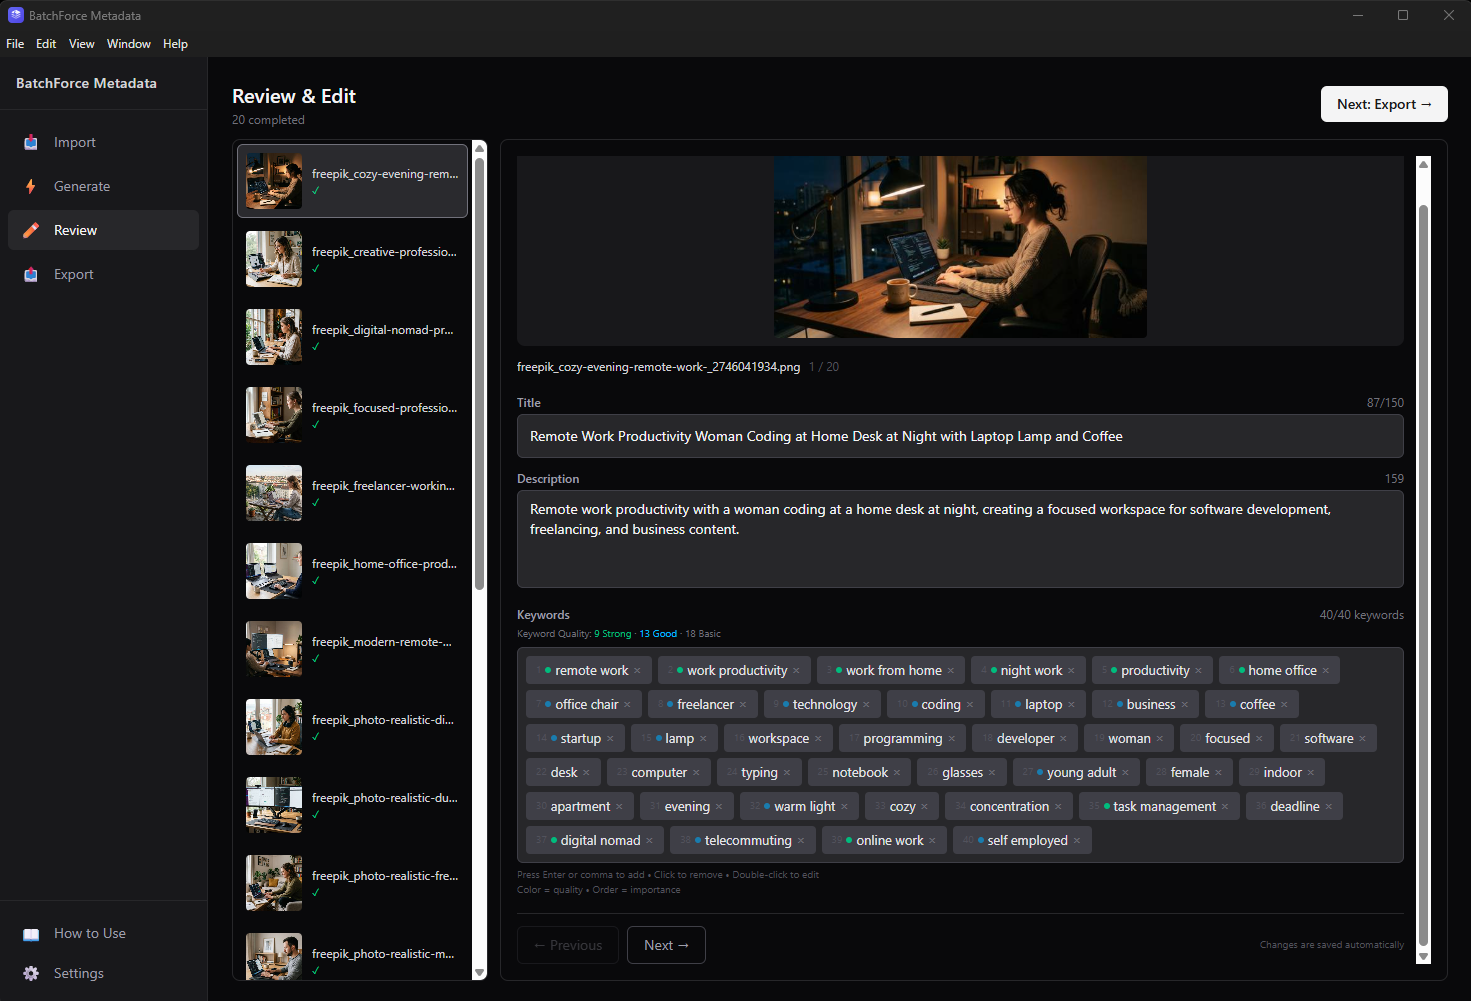
5. Review and edit metadata
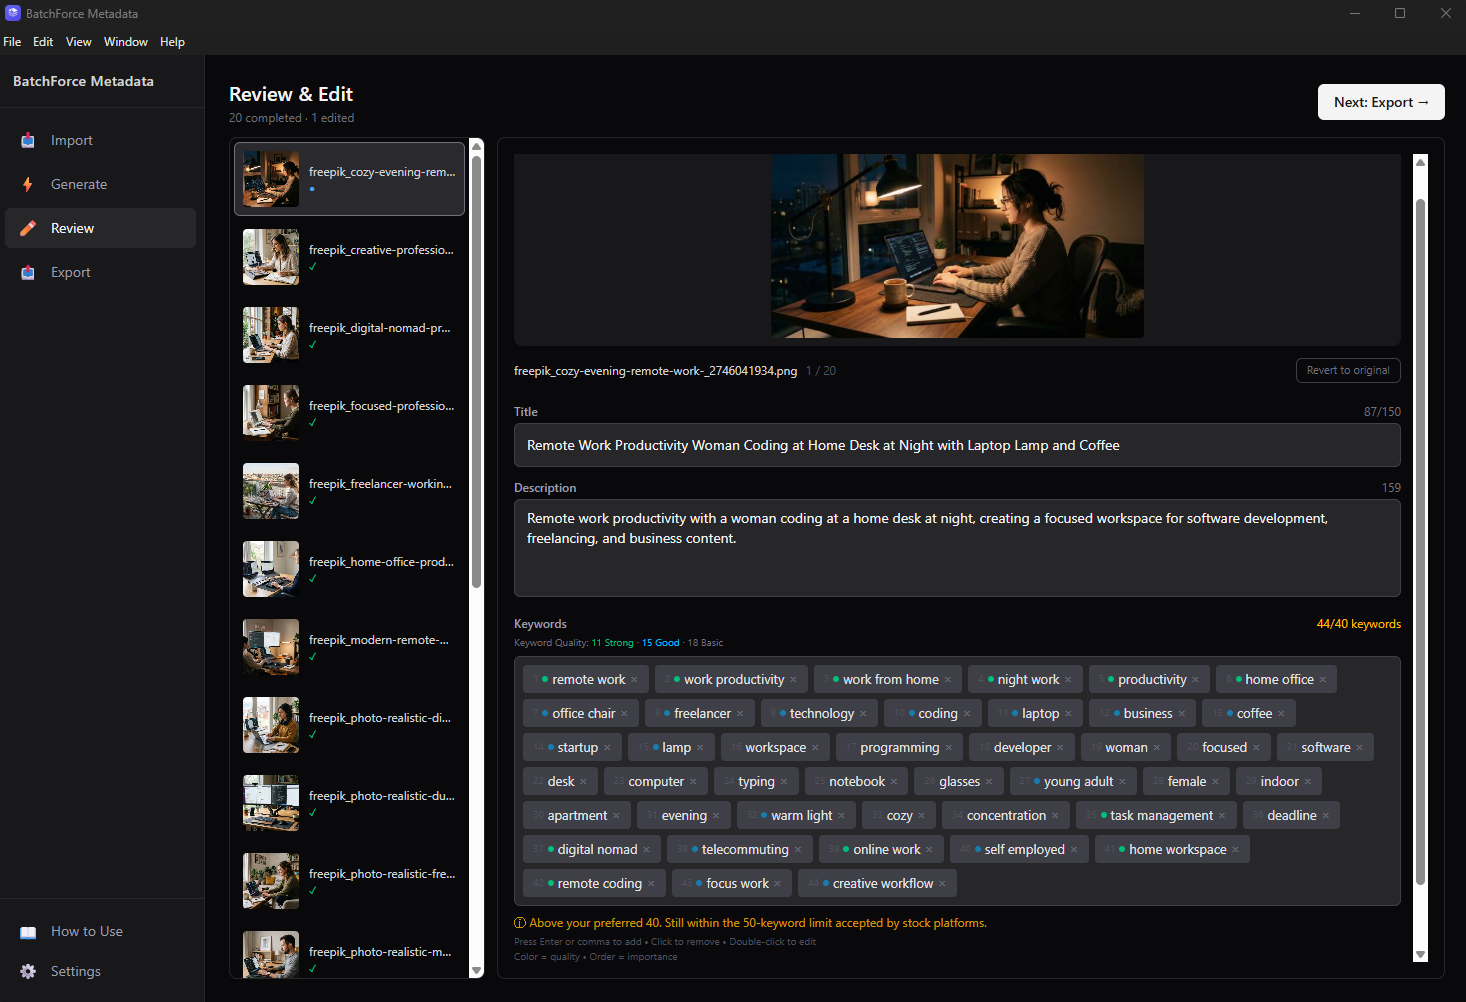
Click Review & Edit to open the Review tab. The file list is on the left and the editor is on the right. Pick a file to inspect and edit its title, description, and keywords. Use the Previous / Next buttons (or click in the list) to walk through your batch.
Review tab — edit Title, Description, and Keywords for each file
What you can edit
Three fields are editable per file:
• Title — with character counter
• Description — with character counter
• Keywords — tag-based, with quality indicators (green/blue dots)
Editing keywords:
• Add a keyword: type and press Enter or comma
• Paste multiple keywords: copy comma-separated text (e.g. "cat, dog, bird") and paste — they are added individually
• Remove a keyword: click the × on the tag
• Edit a keyword: double-click the tag
• Reorder keywords: drag a keyword tag to a new position (order = importance for stock search)
There is no Category field — stock platforms auto-categorize from your title and keywords.
Keyword quality indicators
Each keyword has a quality indicator shown as a colored dot before the tag:
• Green dot = Strong — high-quality keyword, highly relevant to the image and your main concept
• Blue dot = Good — solid keyword, useful for discovery
• No dot = Basic — generic keyword, may be too broad
The summary bar at the top shows the count for each level, e.g. "Keyword Quality: 5 Strong · 12 Good · 18 Basic"
Bulk edit multiple files at once
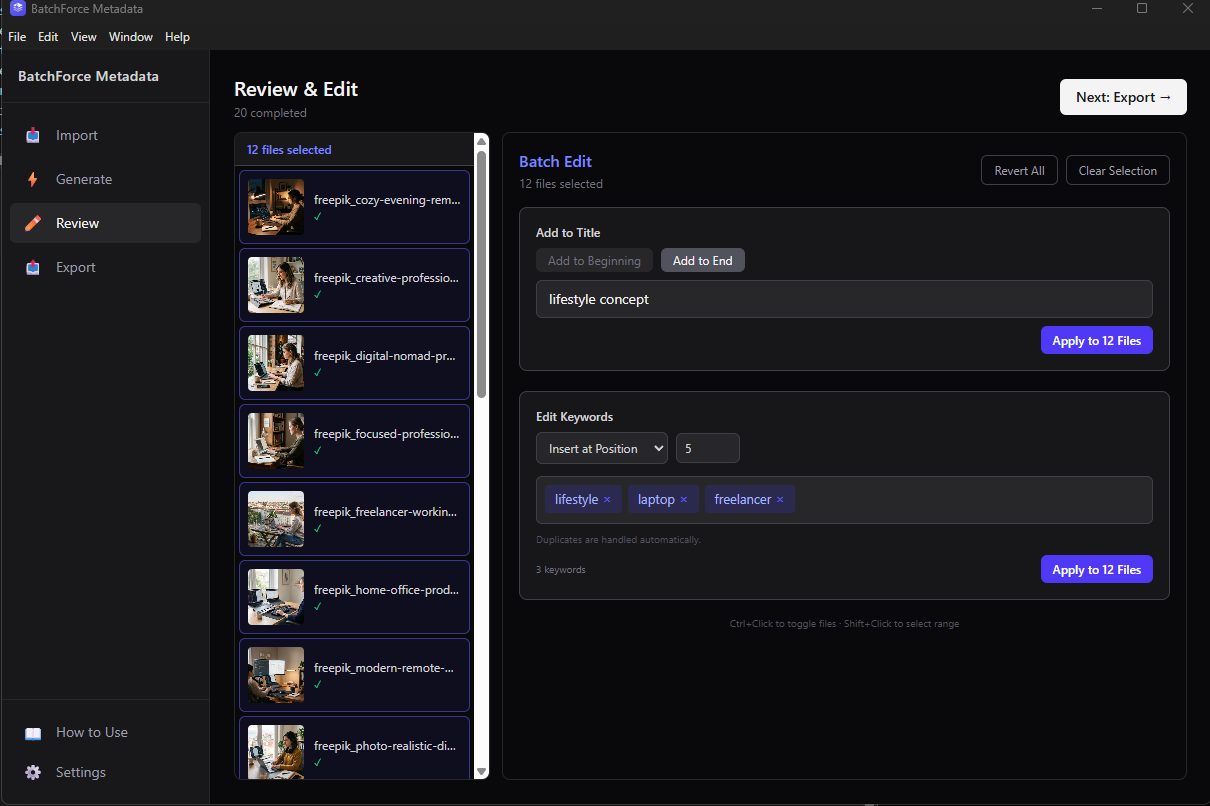
Hold Ctrl and click to toggle individual files, or hold Shift and click to select a range. The right panel switches into Batch Edit mode and shows the actions you can apply to every selected file.
Batch Edit panel — every action applies to all selected files
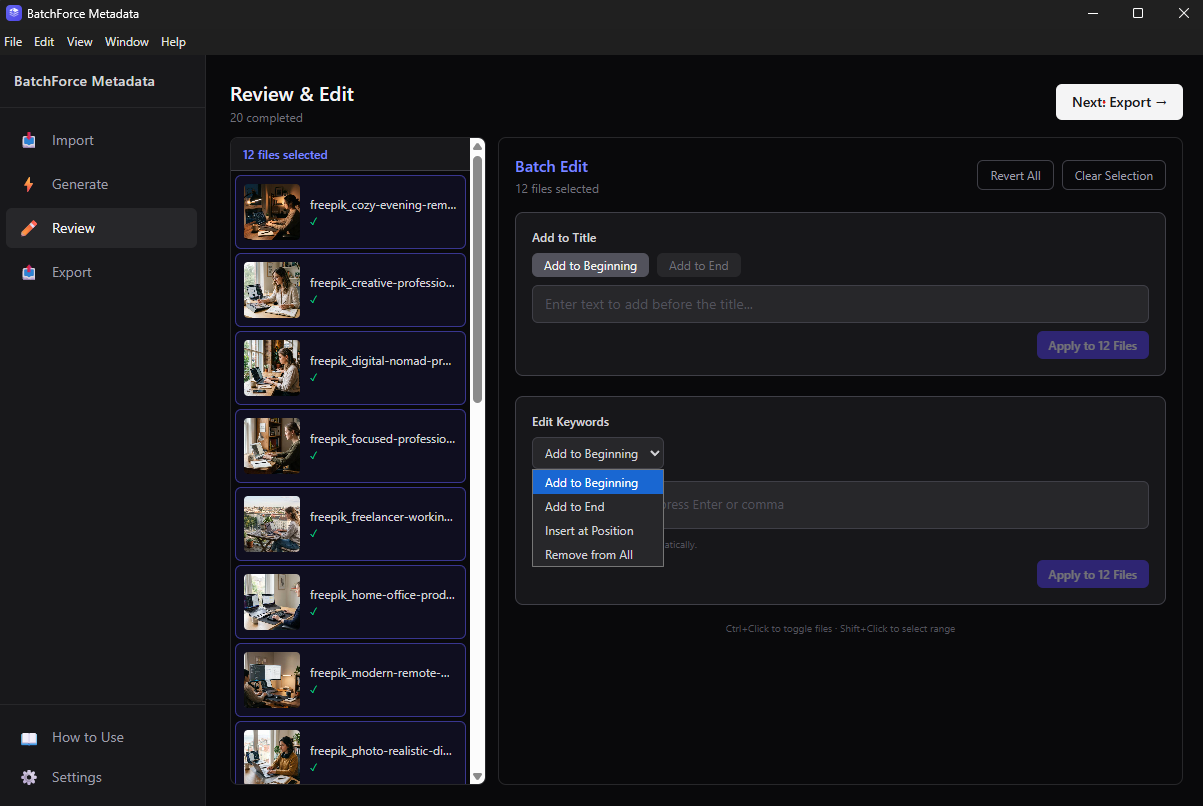
Batch Edit dropdown — pick where new keywords get inserted
Batch Edit can add a phrase to the beginning or end of every title, add new keywords at a specific position, remove keywords from every file at once, or revert all selected files back to the original AI output.
Watch your character and keyword limits
The keyword counter has three states:
• Normal — keyword count is within your preferred maximum → grey counter, no warning.
• Soft warning (amber) — keyword count is above your preferred maximum but still within 50 → amber counter and message "Above your preferred N. Still within the 50-keyword limit accepted by stock platforms." The keywords box border stays neutral — this is informational, not an error. You can still upload.
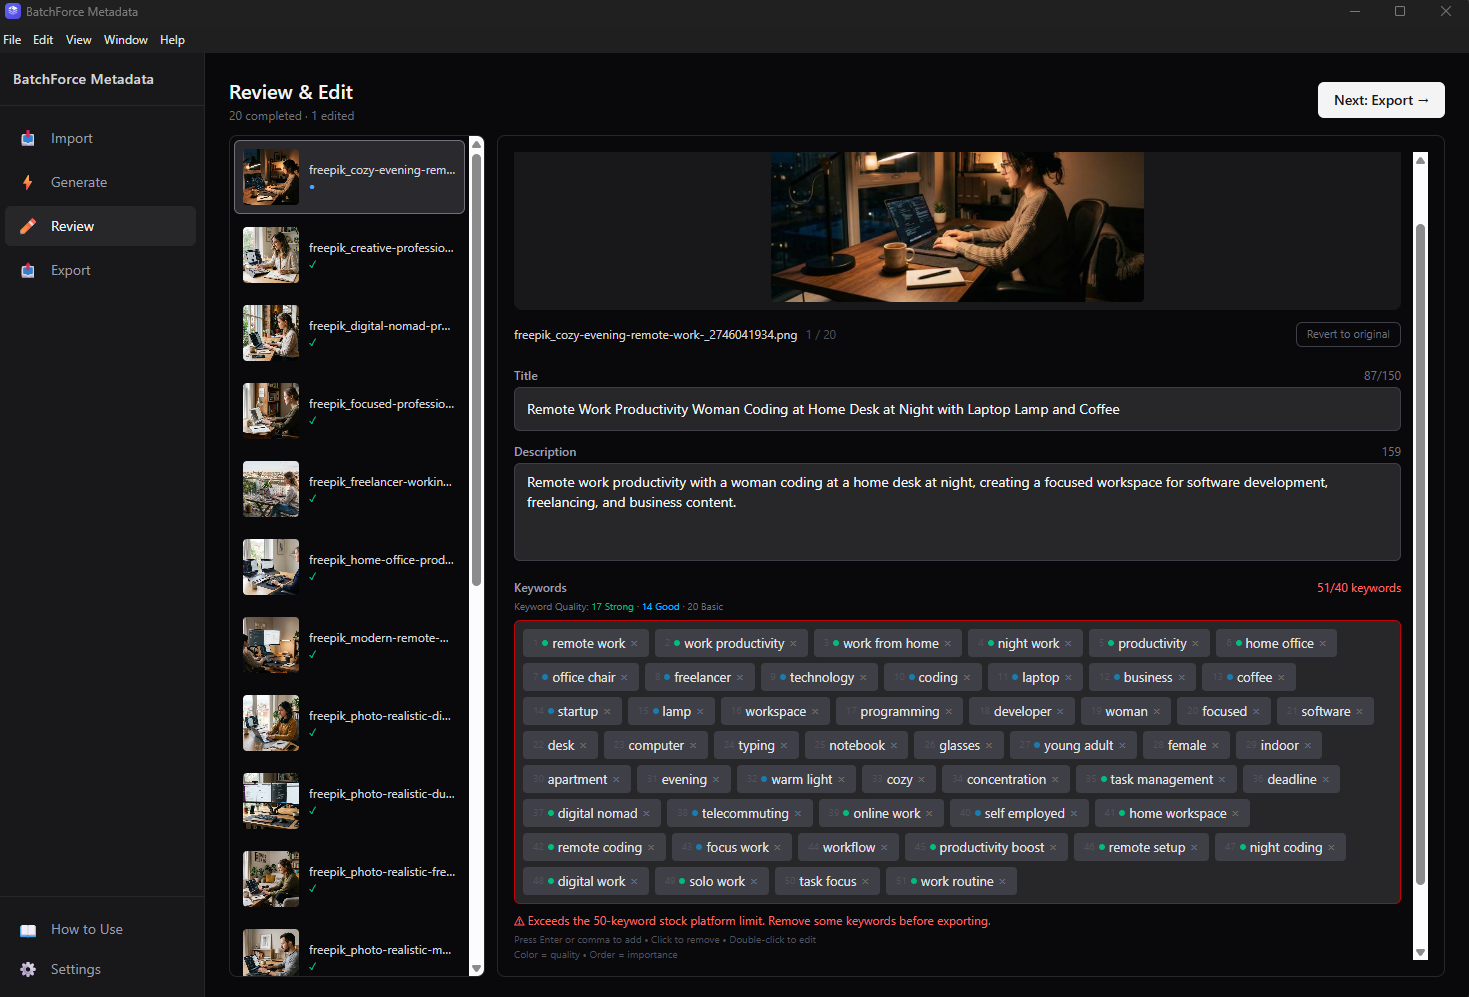
• Hard limit (red) — keyword count exceeds 50, which is above the maximum that most stock platforms accept → red counter, red border, and message "Exceeds the 50-keyword stock platform limit. Remove some keywords before exporting."
Soft amber warning — keyword count above your preferred maximum but still within 50
Red warning when keyword count exceeds the 50-keyword stock platform limit
Warning: Every change is saved instantly to the current session — no Save button needed. You can switch between the Generate / Review / Export tabs and your edits will stay.
Note: edits are only kept while the app is running. If you close the app, metadata is not preserved for next time, and importing any folder afterwards (including the same folder) will reset the metadata. If you plan to make extensive edits, finish them and click Re-export before closing the app — that writes your final metadata to the embedded files and CSVs on disk.
6. Re-export edited files (optional)
If you edited anything in Review, click the Export tab in the sidebar. You will see a count of how many files were edited and a Re-export button. Re-exporting writes a brand new output folder ending in _reexport so your original output is preserved.
Re-export creates a new folder ending in _reexport
Note: You only need to visit the Export tab if you re-edited files in Review. Otherwise the original output from Step 4 is the final result — skip straight to Step 7.
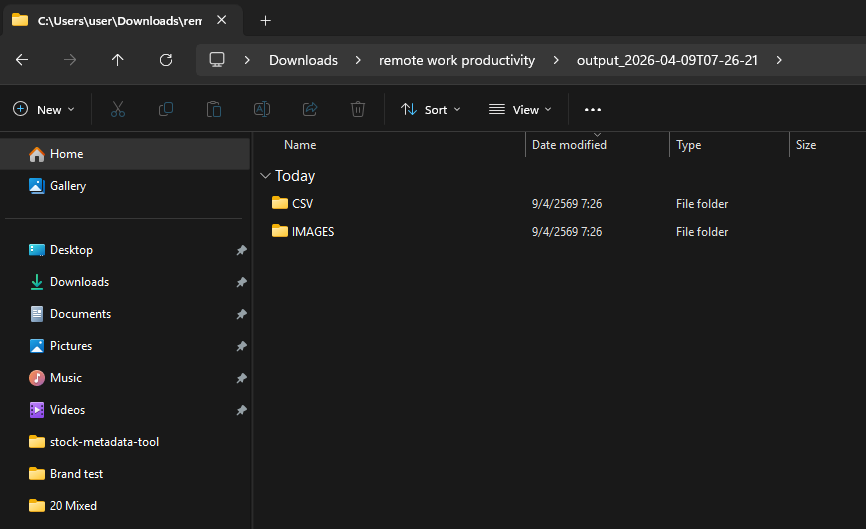
7. Find your output files
The output folder is created automatically next to your source files. The folder name uses your local time, like output_2026-04-09T07-26-21. Inside it you will find an IMAGES folder (with 300 DPI images and embedded metadata — regular PNGs converted to JPG), a VIDEOS folder if you imported any clips, a CSV folder, and an ERROR folder if any files failed.
The output folder is created next to your source files
CSV files for every major stock platform
BatchForce Metadata writes 5 CSV files in one pass — you do not have to choose a platform up front. Upload whichever one matches the site you are submitting to:
• shutterstock.csv
• adobe_stock.csv
• istock.csv
• 123rf.csv
• metadata.csv (a generic format that works with Vecteezy, Freepik, Dreamstime and other platforms)
5 CSV files generated automatically — pick the one that matches your stock platform
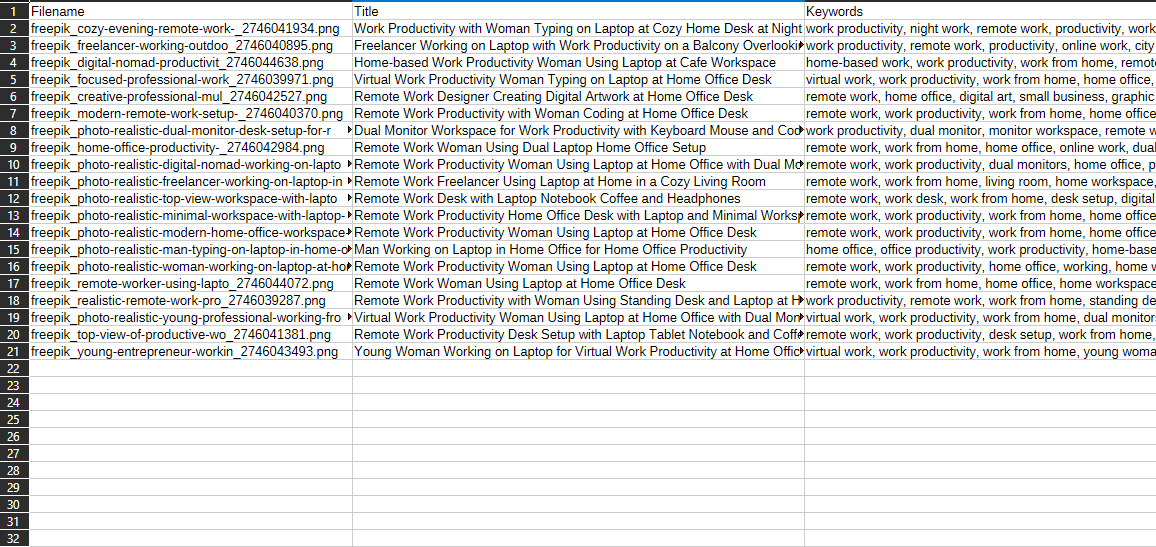
What is inside each CSV
Open any CSV in Excel, Google Sheets or LibreOffice. Each row is one of your files with its filename, title, description and keywords filled in to match what that stock platform expects.
Example CSV opened in a spreadsheet
Note: All images are exported at 300 DPI (original quality preserved, no re-encoding) and ship with IPTC and XMP metadata embedded directly into the file. Regular PNG photos are converted to JPG automatically; transparent PNGs are kept as-is. If you upload the IMAGES files instead of the CSV, the platform reads the metadata straight from the file.
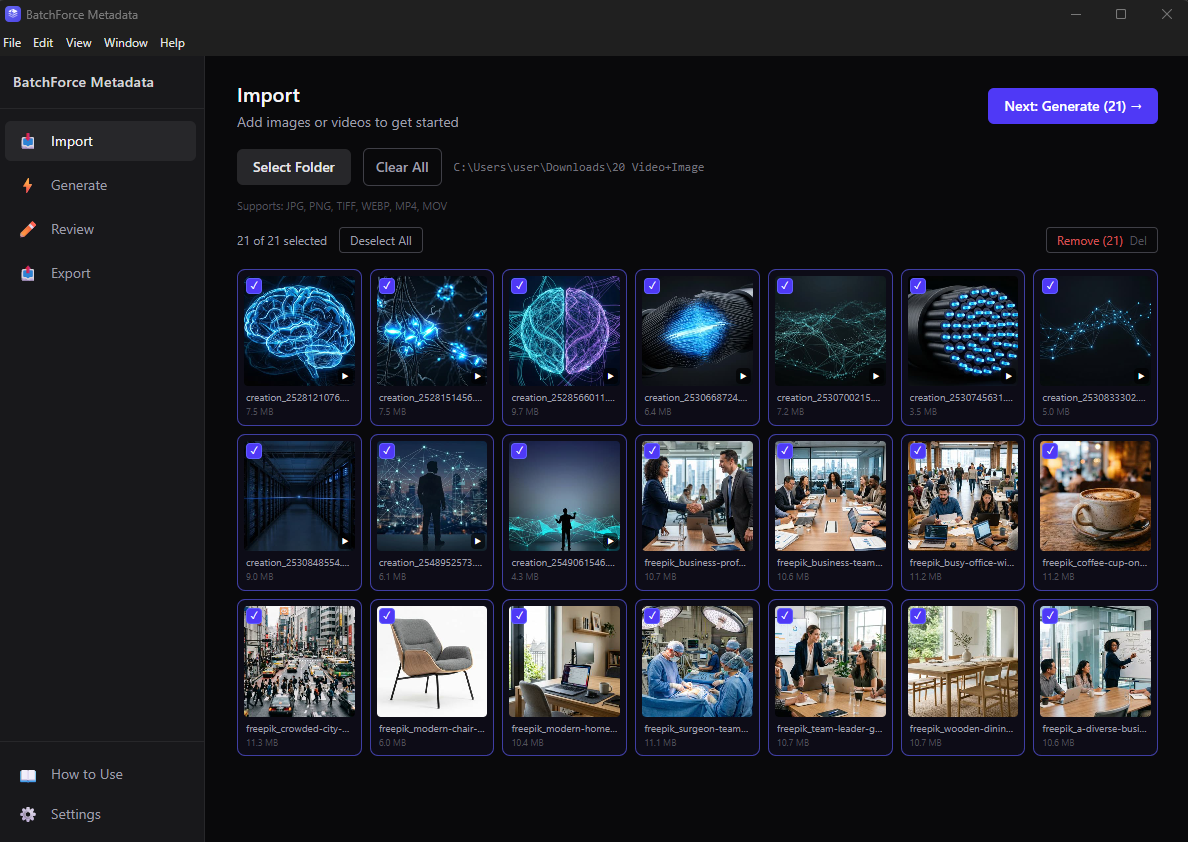
Working with videos
BatchForce Metadata also supports generating metadata for stock videos. In addition to images, you can import MP4, MOV, and M4V video files mixed in the same batch as your images — the app handles them automatically.
Importing videos
Add video files the same way you add images — Select Folder, drag-and-drop, or drop individual files. Video files appear as thumbnails with a ▶ Play icon overlay in the bottom-right corner so you can easily distinguish them from images.
Mixed import — videos have a play icon overlay in the bottom-right corner
Embed metadata in video files (optional)
When your batch contains video files, the Generate page shows an additional toggle: "Embed metadata in video files".
• Unchecked (default) — The app puts video metadata only in the CSV files, without embedding it into the video files themselves. This is much faster and works for typical workflows.
• Checked — The app embeds metadata (XMP) directly into each video file. This is slower but useful if you need metadata embedded in the file itself.
Why is the default unchecked? The generated CSV files already contain all video metadata. Most stock platforms primarily use CSV uploads for metadata, so embedding into video files is optional — leaving it off makes the typical workflow significantly faster.
Generate page showing the Embed metadata in video files toggle
Output folder structure with videos
When a batch contains videos, the app creates a separate VIDEOS/ subfolder in the output, alongside IMAGES/, to keep things organized.
Resulting structure:
output_YYYY-MM-DDThh-mm-ss/
├── IMAGES/ (300 DPI images with embedded metadata; regular PNGs converted to JPG)
├── VIDEOS/ (video files — metadata embedded only if you ticked the toggle)
├── CSV/ (5 CSV files — contain metadata for both images and videos)
└── ERROR/ (only if any files failed)
Output folder in File Explorer with the VIDEOS subfolder visible alongside CSV and IMAGES
Troubleshooting
Generate stops or hangs
Check your internet connection, then open Settings and click Test next to your OpenAI API key. If everything looks fine, click Cancel and try again — the app has a 60-second timeout per file. If you keep hitting it, try a smaller batch (5-10 files) to isolate the problem.
OpenAI rate limit or quota exceeded
The app retries automatically with backoff so brief rate limits sort themselves out. If you see this often, check your billing on the OpenAI dashboard, switch to Budget mode (uses fewer tokens), or break your work into smaller batches with a 1-5 minute pause between them.
The mode switched on its own
This is normal. Before each batch the app does a preflight check — if the model you picked is temporarily unavailable, it falls back automatically (High Quality → Balanced → Budget) and shows a yellow banner. You do not need to do anything.
Keywords don't match my style
Try setting a clearer Main Concept, add unwanted words to Excluded Keywords, or use Title Structure to lock in your signature wording. You can also fix things by hand in Review — your edits auto-save and you can re-export when you are done.
Excel shows broken characters in CSV
The CSVs are written as UTF-8 with a BOM, but old Excel versions still mis-detect them. In Excel, use Data → From Text/CSV and pick UTF-8 in the import dialog. Or open the file in Google Sheets or LibreOffice — both detect the encoding correctly.
Some files are missing from the output
Check the ERROR folder inside your output. There is an errors.csv listing every file that failed and why, and the failed files themselves are copied (never moved) into ERROR/ — nothing is actually lost.
Will my edits persist after closing the app?
Edits made in Review live only in the current session. Closing the app discards them, and importing any folder again afterwards resets the metadata. If you have extensive edits to keep, finish them and click Re-export in the Export tab before closing — Re-export writes your final metadata to the embedded files and CSVs on disk so you keep them permanently.
Transparent PNG keywords include "white background"
The app already hints to the AI that white pixels in PNGs come from a flatten step, but a stubborn case can still slip through. Add "white background" and "isolated" to Excluded Keywords for that batch.